For this week’s challenge I’m calling on all abstract artists to join us! This exercise is a crash course in composition. We are going to learn how to place the different elements of a drawing. The purpose is to come up with a system to insure that our pictures have an interesting and engaging design. Today’s challenge is a kind of analytical approach to creativity.
We are going to learn the thumbnail approach to help overcome the stress induced by the dreaded white page!
What is soooo cool about today’s lesson is that it can be applied to both realist and abstract art. So in a way I’m going to challenge the misnomer that these two genres of art are somehow separate!
Choosing our source material
For today’s challenge we are going to borrow elements from two old master ink drawings.
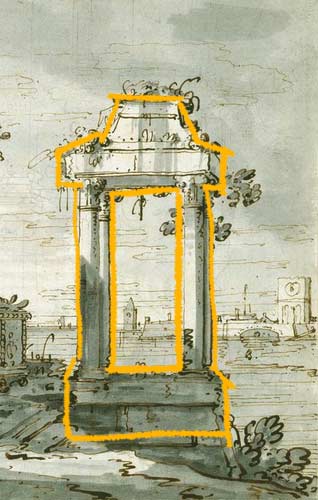
We are going to use part of the Roman ruin from the drawing below:

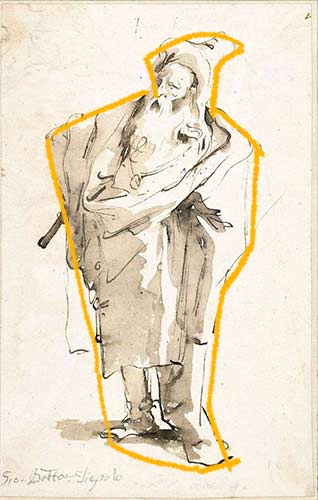
And you can choose one of the following characters drawn by Giovanni Battista Tiepolo:
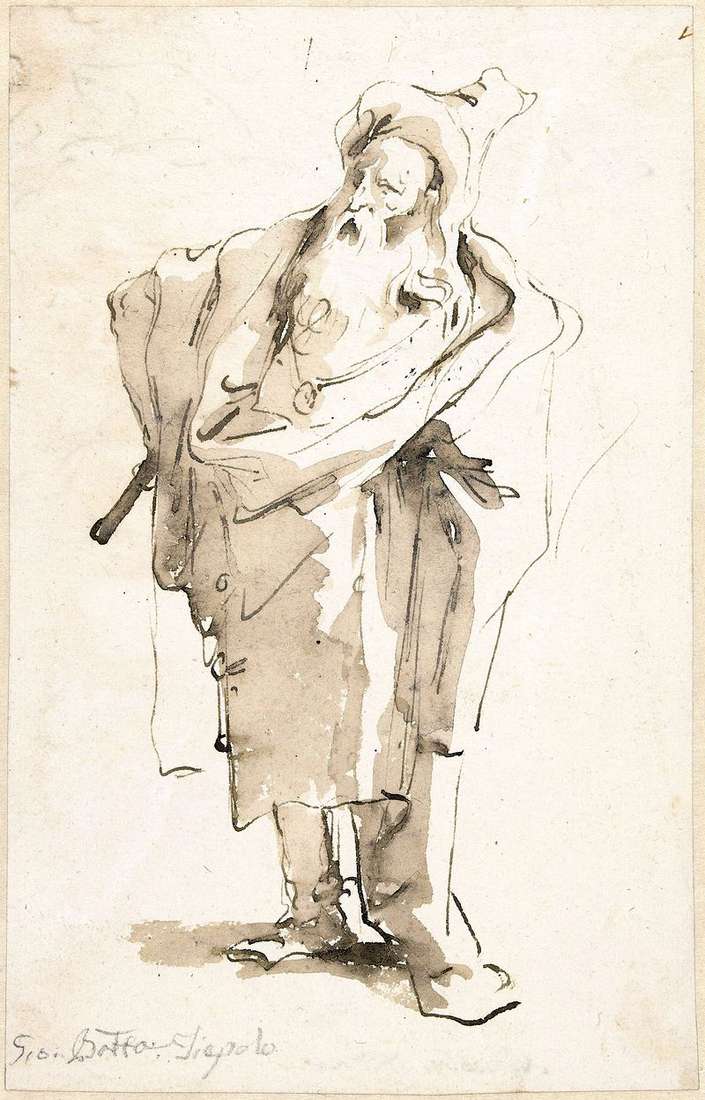
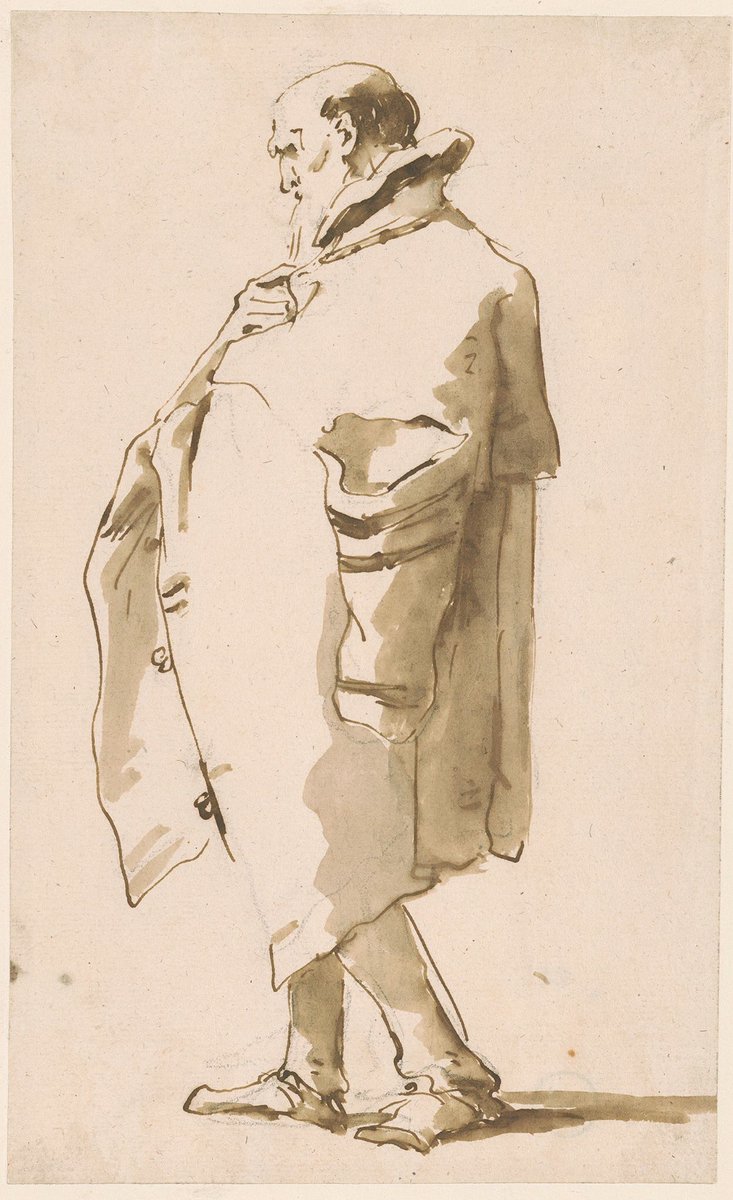
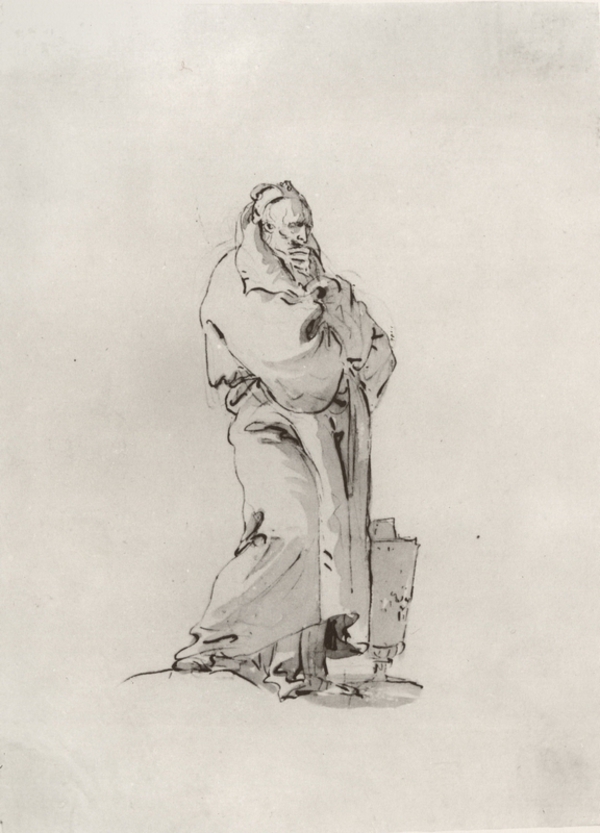
Simplifying and flattening our main shapes
We are going to do a series of very small, quick, drawings so it is important to simplify our main shapes. No detail. We want to reduce each element into a flat shape we can draw in less than 30 secounds.
Thumbnail
Often I will get really excited about an idea I have for a drawing and I will start a very finished version before trying out different approaches. I will get two-thirds of the way through my drawing and all of a sudden a better composition will hit me.
By taking the time to rough out a bunch of small versions of our final drawing, we avoid this kind of mistake. Also it’s a great exercise to start to develop your own personal aesthetic or theory of design. Our goal is to do somewhere between 6 and 12 quick sketches. We want to try out a variety of different compositions.
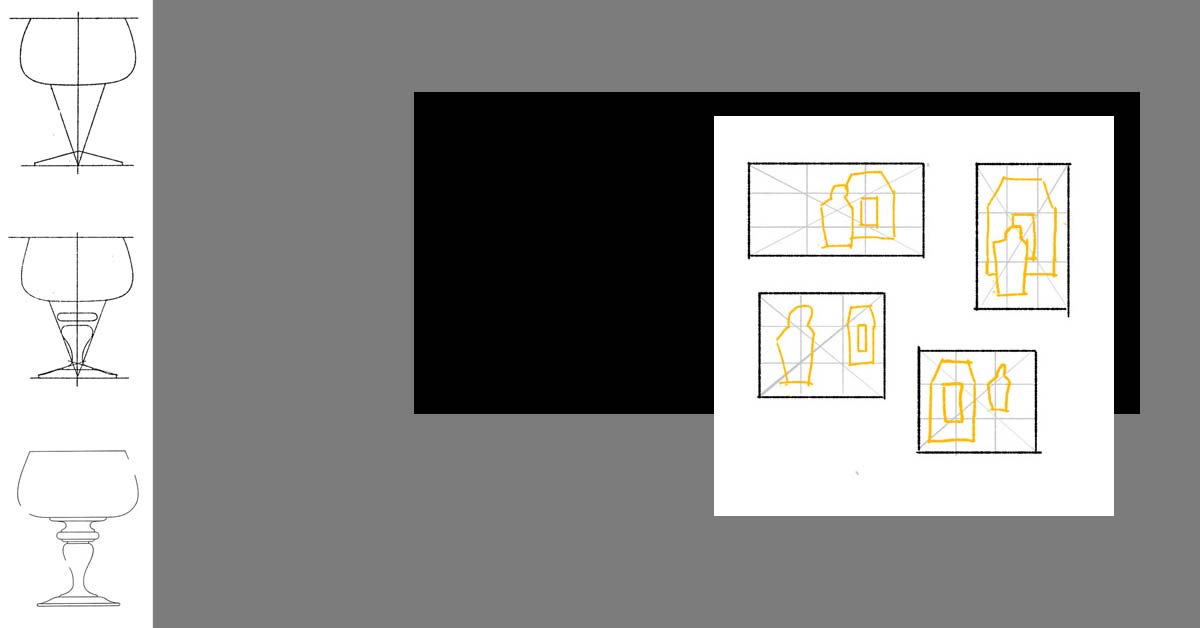
Placement of shapes
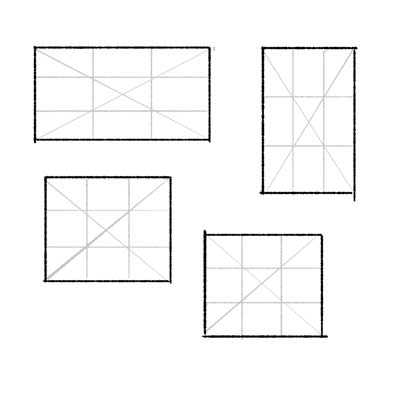
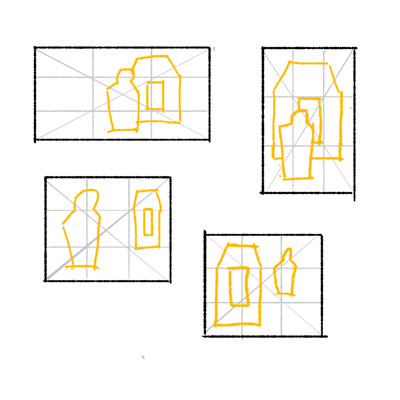
First step is to block out a rectangles on a blank page. It should measure about 2 inches or the length of your thumb. Keep your thumbnail small. By keeping it small we make it impossible to include detail in out drawing. At this stage detail is our enemy.
Start by making your rectangle into an evenly spaced grid. Create three equal columns and three equal rows. Drawing corner to corner, draw an X across your rectangle. Repeat the same process for the next 2 thumbnails. For now keep your rectangles the same shape and dimension.
Using these grids we can think of our canvas in terms of different quadrants. Using your three thumbnails, lets try three different designs where we keep the architectural shape in the top left quadrant. For each drawing lets place our figure shape in a different column.
If you like one of those designs, now try 2 to 3 designs where you keep the figure fixed and instead move your architectural shape from left to right.
Size of shapes
Another way to vary our design is to play with the size of our shapes. Grid out three more thumbnails (3 x 3). Choose your favorite design from the last exercise.
Let’s say your design has the figure in the bottom right of the canvas and the architectural shape in the top left corner. Again let’s keep the architectural shape fixed. In the next two thumbnails, let’s grow our figure. First, Let’s take it all the way to the top row. For our third version, we can actually grow the figure to a size beyond that of the canvas. Let’s make it so big that you only see the lower half of the figure.
Again choose the design you most like and let’s try two new versions where you keep the figure fixed and grow and shrink the architectural shape.
Shape of your canvas
Working this small gives us ultimate freedom. Another great way to inspire new designs is to change the shape of your rectangle. Try flipping your rectangle from a portrait format to a landscape format. Or try varying the proportions of your rectangle. It is amazing how much the shape and orientation of your page will inspire composition!
Using line to guide your design
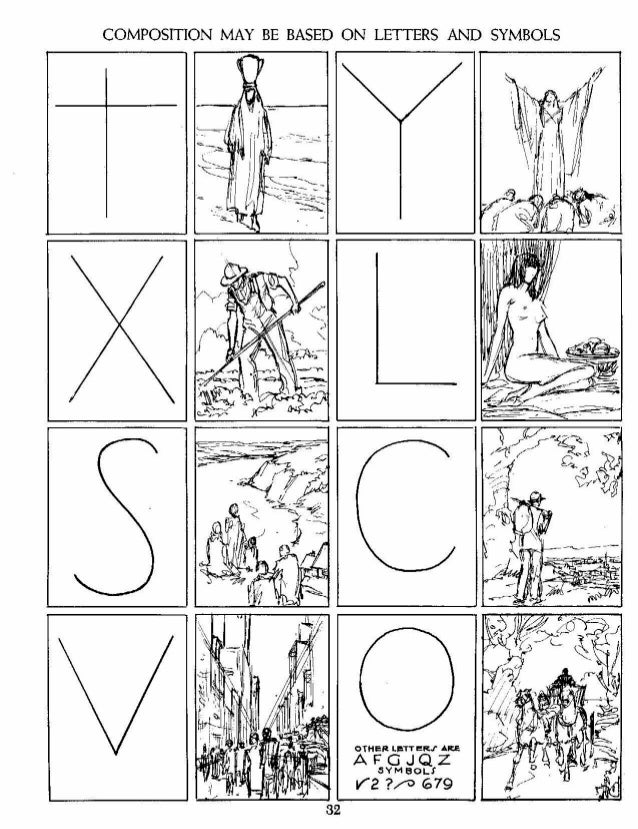
Instead of using a grid, we can use line to help us think about the spacing and relationship of the different elements in our picture.
A couple lines to keep in mind are:
1. Cross
2. S curve
3. C curve
4. L curve
5. Diagonal line
Start your composition by indicating one of these lines. Now think about how you can place your elements so that their positioning suggests the line. To better understand look at the following example by Andrew Loomis:
Final drawing
The aim is to produce at least 12 different thumbnail designs. Each new design should build on idea discovered in the last sketch. Once you have come up with a really great design, do a larger more finished version of the drawing!
For any abstract artists, why not use this design as a starting point for your next painting? Or you can play with the shapes. Reduce them to something even more simple. Or changes some of the lines from straight to wiggly. The possibilities are endless!