I am so excited to say that we are one month into the drawing challenge! For those of you who have been drawing with me since week one or two, Thank You! It has been soo much fun to see all of your awesome work!
For those of you joining us for the first or secound time, welcome! To find out more about the drawing challenge, I’ve posted an overview of the challenge here.
This week’s challenge
This week we are going to work from a really great drawing book on ornament design, Cusack’s Freehand Ornament, by C. Armstrong. The book was printed back in 1895 and a free PDF is available online.
For a little perspective, these exercises were intended for school children. That’s right a hundred years ago, kids as young as 12 were expected to have fundamental drawing skills.
In his introduction Armstrong writes:
Art is long, one must not be discouraged, but must give the subject more time and more brain effort, by which in the end they will succeed. It is to be remembered that not the fact of being born clever makes a genius, but that infinite trouble is the mother of genius.
So with that in mind let’s take on one of the biggest challenges in drawing : Line Quality.
The challenge with lines is that they require practice. There is only so much of the process that you can intellectualize. To get beautiful straight or curved lines you have to practice. That means making a lot of ugly lines and that can feel discouraging.
But there are tricks to help attack this challenge. Building on the block in technique we learned in weeks 1 and 2, Let’s explore a process that makes our job simpler.
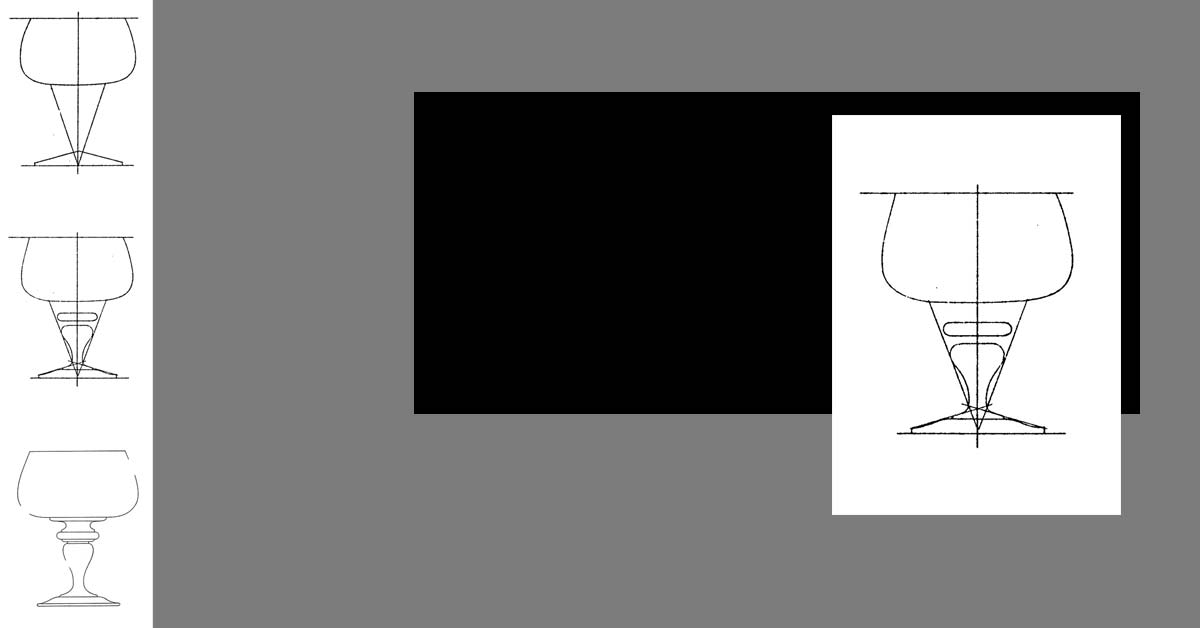
How to start the drawing
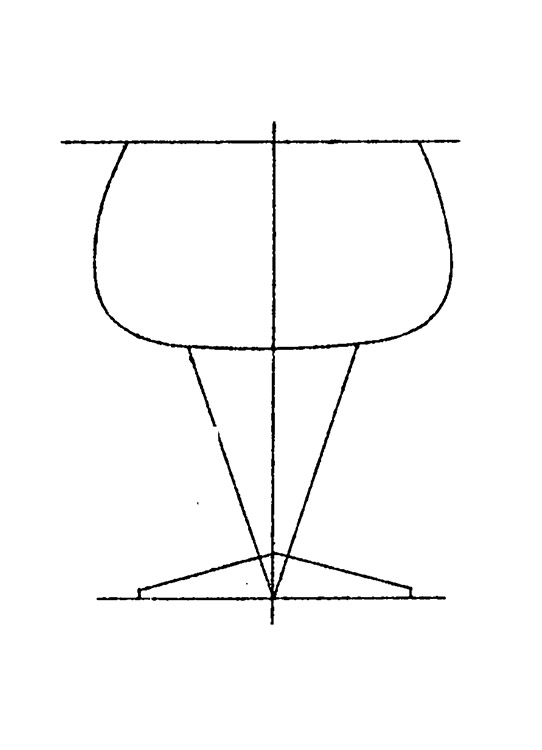
To start our drawing we are going to block-in the glass by reducing its parts to basic flat shapes. They will be represented by a squared semi-circle. For the stem we ignore all the detail of the final drawing and we use an upside down triangle. and for the base a secound triangle. Already we understand what is being represented.
Work big to small
As we start to add detail, we want to keep in mind the principal of big to small. This means we start by adding the largest shapes.
The upside down triangle should act as borders for the new shapes you are drawing. Think about the negative space between the curved lines and the edges of the triangle. Make sure that your new shapes stay within your triangle. If they don’t seem to fit, go back a step and redraw that triangle.
As you add these large shapes, take measurements. Compare the size of the curved part of the stem with the top of the glass. These two shapes are very close in length. Make sure that is true of your drawing.
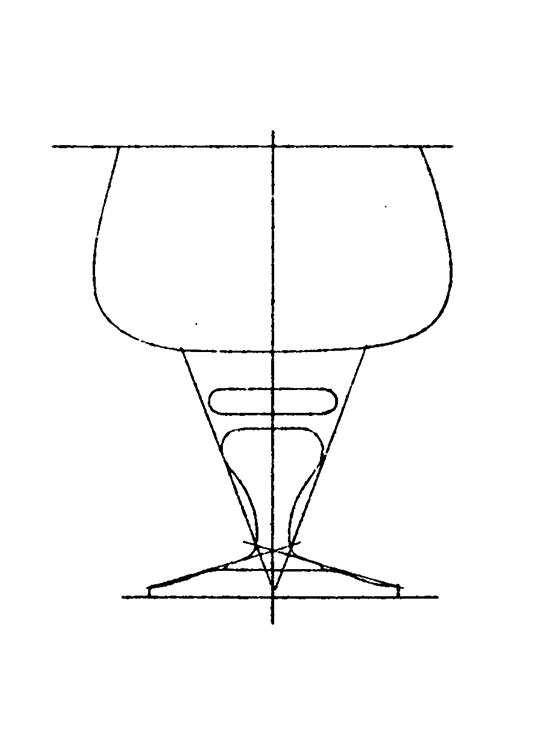
How to clean up your lines
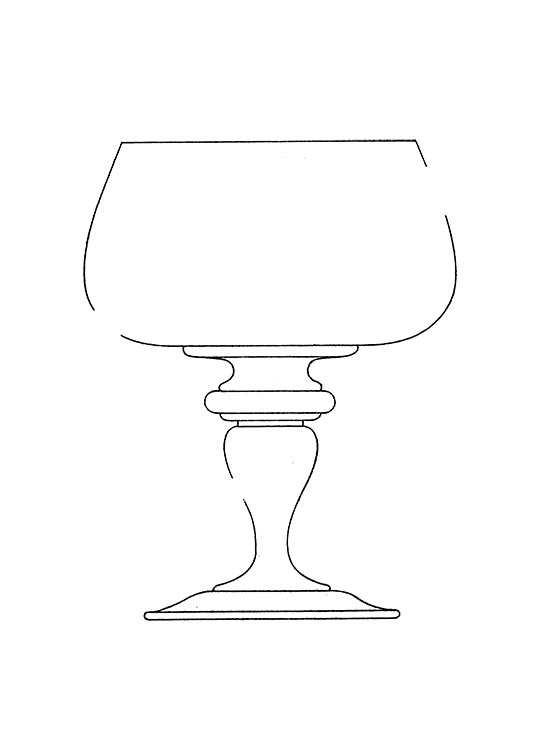
Now you have enough information to add the details that make the drawing interesting and dynamic. Take your time adding these last shapes.
When you are satisfied with your drawing, you can take a darker or thicker pen to draw over your lines. Make sure to take your time on this final step. Keep looking at the original drawing. It’s easy to fall into automatic mode here and lose some of the subtlety of your lines.